TLDR; SSH with public-private key is quite secure, but it relies on you keeping your private key secure – a single point of failure. OpenSSH allows the additional use of one-time passwords (OTP) such as those generated via google authenticator app. This 2FA option provides for “better” security which I personally think is a good practice for ssh via wide area network access (i.e. over the intenet), but truth be told it’s not always convenient because, out-of-the-box and with most online instructions, you also have to use it when on your local area network which should be much more secure than accessing devices via the internet. Herein I describe how to setup 2FA (most important) and also how to bypass 2FA when using ssh on home lan-to-lan connections, but to always require it from anywhere outside the lan. This means your daily maintenance on-site can provide easy access to servers (using just your ssh key) whilst still protecting them with 2FA from any internet access.
My instructions below work on a July 2022 fresh install of Ubuntu 20.04 server, with OpenSSH installed (‘sudo apt update && sudo apt install openssh-server’ on your server if you need to do this). I further assume right now that you have password access to this server, which is insecure but we will fix that. I also assume the server is being accessed from a July 2022 fresh install of Ubuntu Desktop (I chose this to try to make it easier – I can’t cover all distros/setups of course).
The instructions for by-passing lan are right at the end of this article, because I spend a lot of time trying to explain how to install google-authenticator on your phone/server (which takes most of the effort). If you already have that enabled, just jump to the END of this article and you will find the very simple steps needed to bypass 2FA for lan access. For anyone else who does NOT use 2FA for ssh, I encourage you to read and try the whole tutorial.
WARNING – these instructions work for me, but your mileage may vary. Please take precautions to make backups and practice this on virtual instances to avoid being locked out of your server! With that said, let’s play:
INSTRUCTIONS
Firstly, these instructions require the use of a time-based token generator, such as google’s authenticator app. Please download and install this on your phone (apple store and play store both carry this and alternative versions). We will need this app later to scan a barcode which ultimately generates one time passwords. The playstore app is located here. Apple’s is here, Or just search the app stores for ‘google authenticator’ and match it with this:
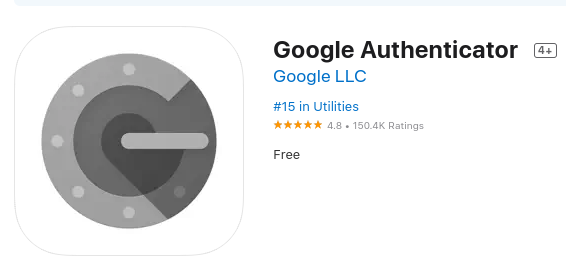
Install it, that’s all you need to do for now.
On your desktop, create an ssh key if required, e.g. for the logged-in user (in my case, username ‘og’) with an email address of [email protected]:
ssh-keygen -t rsa -b 4096 -C "[email protected]"
Enter a file name, or accept the default as I did (press ‘Enter’). Enter a passphrase for the key if you wish (for this demo, I am not using a passphrase, so I just hit enter twice). A passphrase more strongly protects your ssh key. You should see output like this:
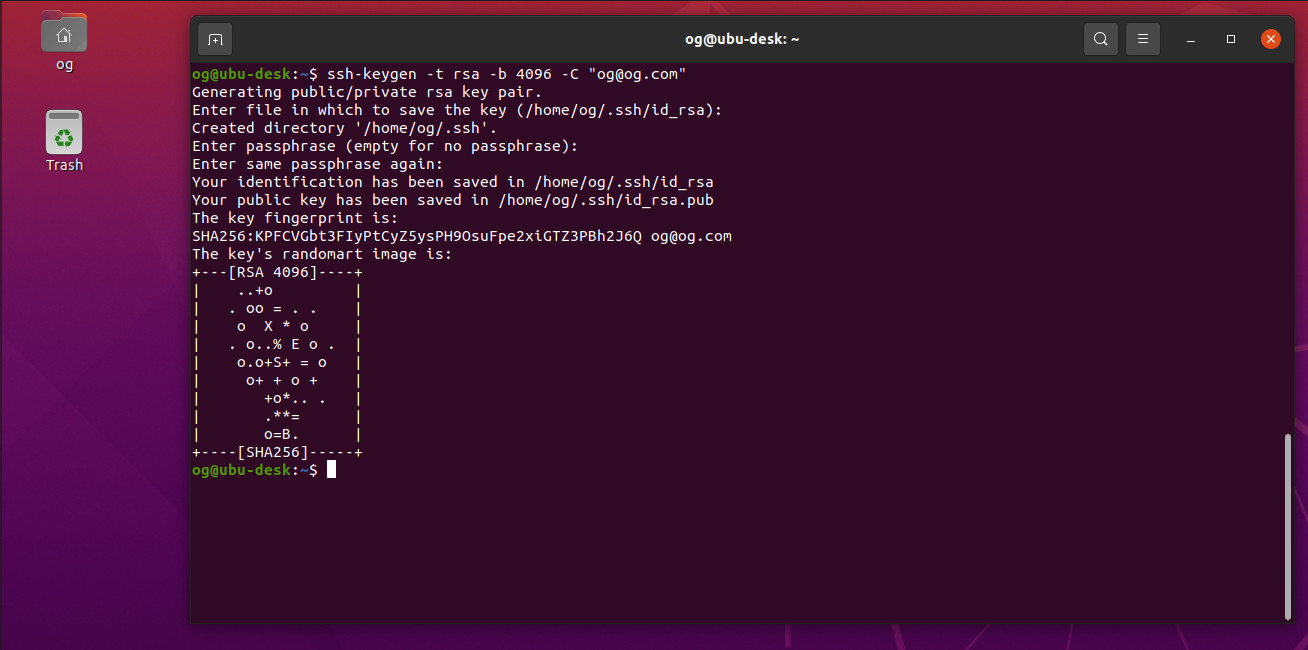
If you now check, you will see a new folder created called .ssh – let’s look inside:
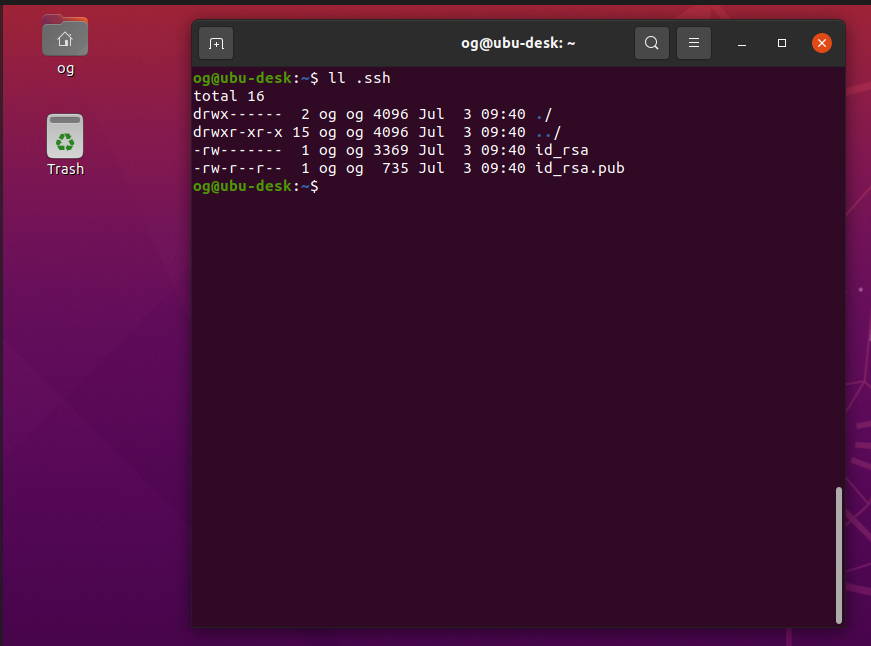
Now let’s copy the ssh key to our server. We assume our server is on ip 10.231.25.145, and your username is og in the commands below. Please change the IP and username for yours accordingly:
ssh-copy-id [email protected]
In my case, this was the first time I accessed this server via ssh, so I also saw a fingerprint challenge, so I was first presented with this, which I accepted (type ‘yes’ and ‘Enter’):

The server then prompts you for your username credentials:

Enter your password to access the server then you will see this message:
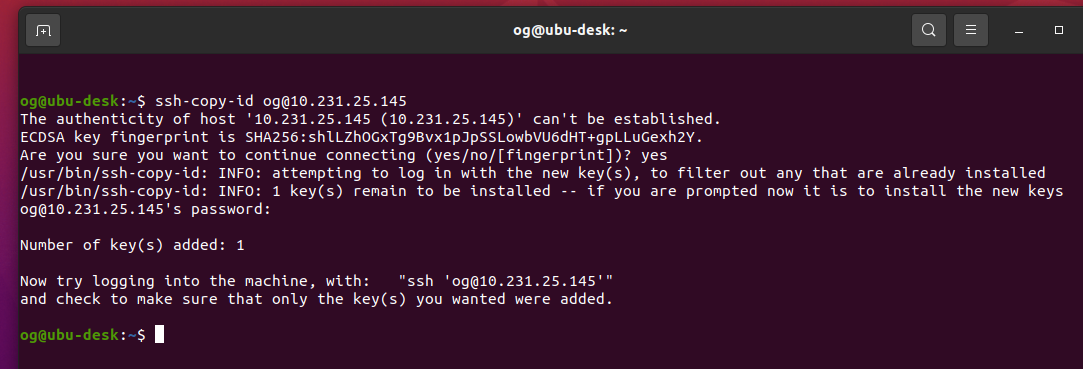
Prove it by logging in as suggested in the screen prompt that you have (in mine, it says ‘try logging into the machine, with ssh [email protected]’ – yours will be different), you should see something like this:
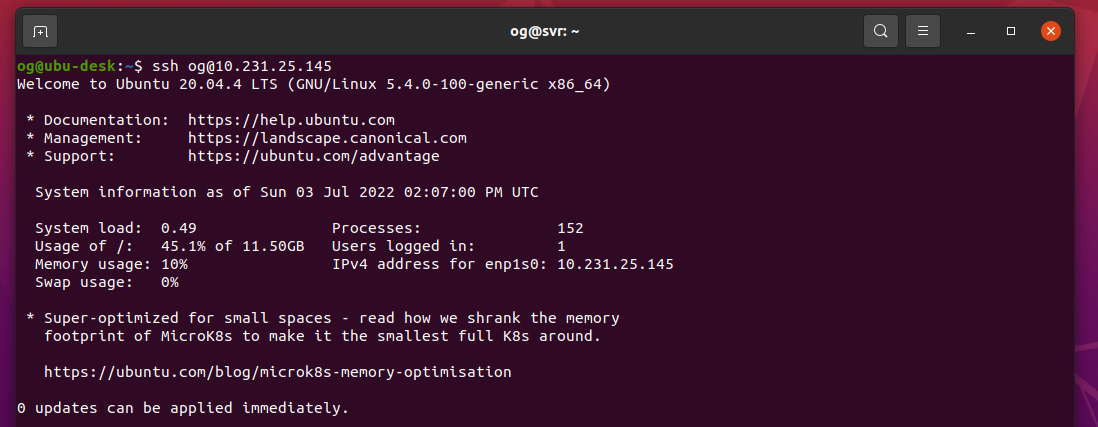
Stage 1 complete – your ssh key is now in the server and you have passwordless and thus much more secure access. Note, if you secured your ssh key with a password, you will be prompted for that every time. There are some options for making that more conveneient too, but that’s right at the very end of this article. Further note: DO NOT delete or change your ssh key as you may otherwise get locked out of ssh access for your server after you make additional changes per below, as I intend to remove password access via ssh to the server:
Log back into your server if required, then edit your ssh config file to make some basic changes needed for key and 2FA access:
sudo nano /etc/ssh/sshd_config
(Here is my complete file, including the changes highlighted in bold red):
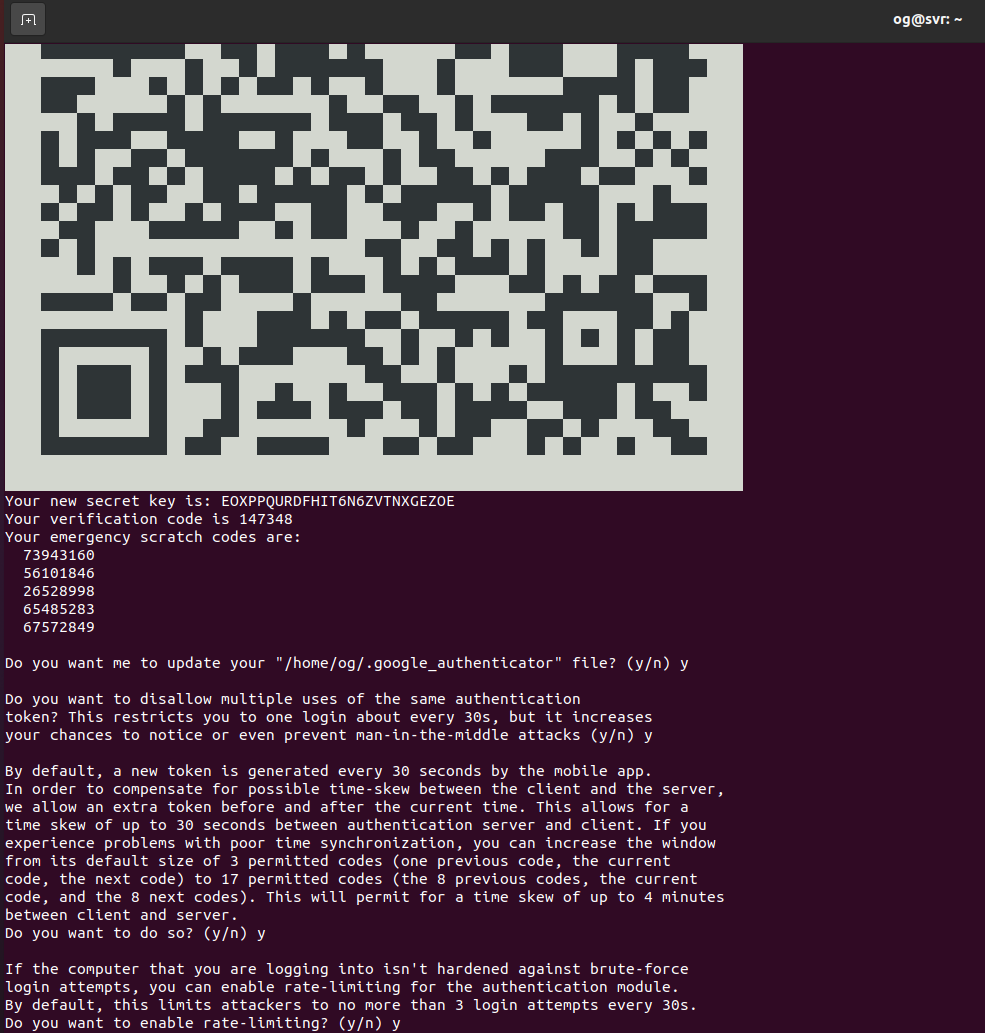
# $OpenBSD: sshd_config,v 1.103 2018/04/09 20:41:22 tj # This is the sshd server system-wide configuration file. See # sshd_config(5) for more information. # This sshd was compiled with PATH=/usr/bin:/bin:/usr/sbin:/sbin # The strategy used for options in the default sshd_config shipped # with # OpenSSH is to specify options with their default value where # possible, but leave them commented. Uncommented options # override the # default value. Include /etc/ssh/sshd_config.d/*.conf #Port 22 #AddressFamily any #ListenAddress 0.0.0.0 #ListenAddress :: #HostKey /etc/ssh/ssh_host_rsa_key #HostKey /etc/ssh/ssh_host_ecdsa_key #HostKey /etc/ssh/ssh_host_ed25519_key # Ciphers and keying #RekeyLimit default none # Logging #SyslogFacility AUTH #LogLevel INFO # Authentication: #LoginGraceTime 2m #PermitRootLogin prohibit-password #StrictModes yes #MaxAuthTries 6 #MaxSessions 10 PubkeyAuthentication yes # Expect .ssh/authorized_keys2 to be disregarded by default in future. #AuthorizedKeysFile .ssh/authorized_keys .ssh/authorized_keys2 #AuthorizedPrincipalsFile none #AuthorizedKeysCommand none #AuthorizedKeysCommandUser nobody # For this to work you will also need host keys in /etc/ssh/ssh_known_hosts #HostbasedAuthentication no # Change to yes if you don't trust ~/.ssh/known_hosts for # HostbasedAuthentication #IgnoreUserKnownHosts no # Don't read the user's ~/.rhosts and ~/.shosts files #IgnoreRhosts yes # To disable tunneled clear text passwords, change to no here! PasswordAuthentication no #PermitEmptyPasswords no # Change to yes to enable challenge-response passwords (beware issues with # some PAM modules and threads) ChallengeResponseAuthentication yes # Kerberos options #KerberosAuthentication no #KerberosOrLocalPasswd yes #KerberosTicketCleanup yes #KerberosGetAFSToken no # GSSAPI options #GSSAPIAuthentication no #GSSAPICleanupCredentials yes #GSSAPIStrictAcceptorCheck yes #GSSAPIKeyExchange no # Set this to 'yes' to enable PAM authentication, account processing, # and session processing. If this is enabled, PAM authentication will # be allowed through the ChallengeResponseAuthentication and # PasswordAuthentication. Depending on your PAM configuration, # PAM authentication via ChallengeResponseAuthentication may bypass # the setting of "PermitRootLogin without-password". # If you just want the PAM account and session checks to run without # PAM authentication, then enable this but set PasswordAuthentication # and ChallengeResponseAuthentication to 'no'. UsePAM yes #AllowAgentForwarding yes #AllowTcpForwarding yes #GatewayPorts no X11Forwarding yes #X11DisplayOffset 10 #X11UseLocalhost yes #PermitTTY yes PrintMotd no #PrintLastLog yes #TCPKeepAlive yes #PermitUserEnvironment no #Compression delayed #ClientAliveInterval 0 #ClientAliveCountMax 3 #UseDNS no #PidFile /var/run/sshd.pid #MaxStartups 10:30:100 #PermitTunnel no #ChrootDirectory none #VersionAddendum none # no default banner path #Banner none # Allow client to pass locale environment variables AcceptEnv LANG LC_* # override default of no subsystems Subsystem sftp /usr/lib/openssh/sftp-server # Example of overriding settings on a per-user basis #Match User anoncvs # X11Forwarding no # AllowTcpForwarding no # PermitTTY no # ForceCommand cvs server AuthenticationMethods publickey,keyboard-interactive (END OF FILE) Note there is a LOT MORE you can do to configure and secure ssh, but these changes (when completed - inc. below) will make for a much more secure installation than what you get 'out of the box'. Now install the server version of google-authenticator on your server - this is what we 'syncronise' to your phone:sudo apt install -y libpam-google-authenticatorNow configure authenticator by typing the following command and hitting 'Enter':google-authenticatorEnter 'y' at the first prompt and you will see somehing like this:
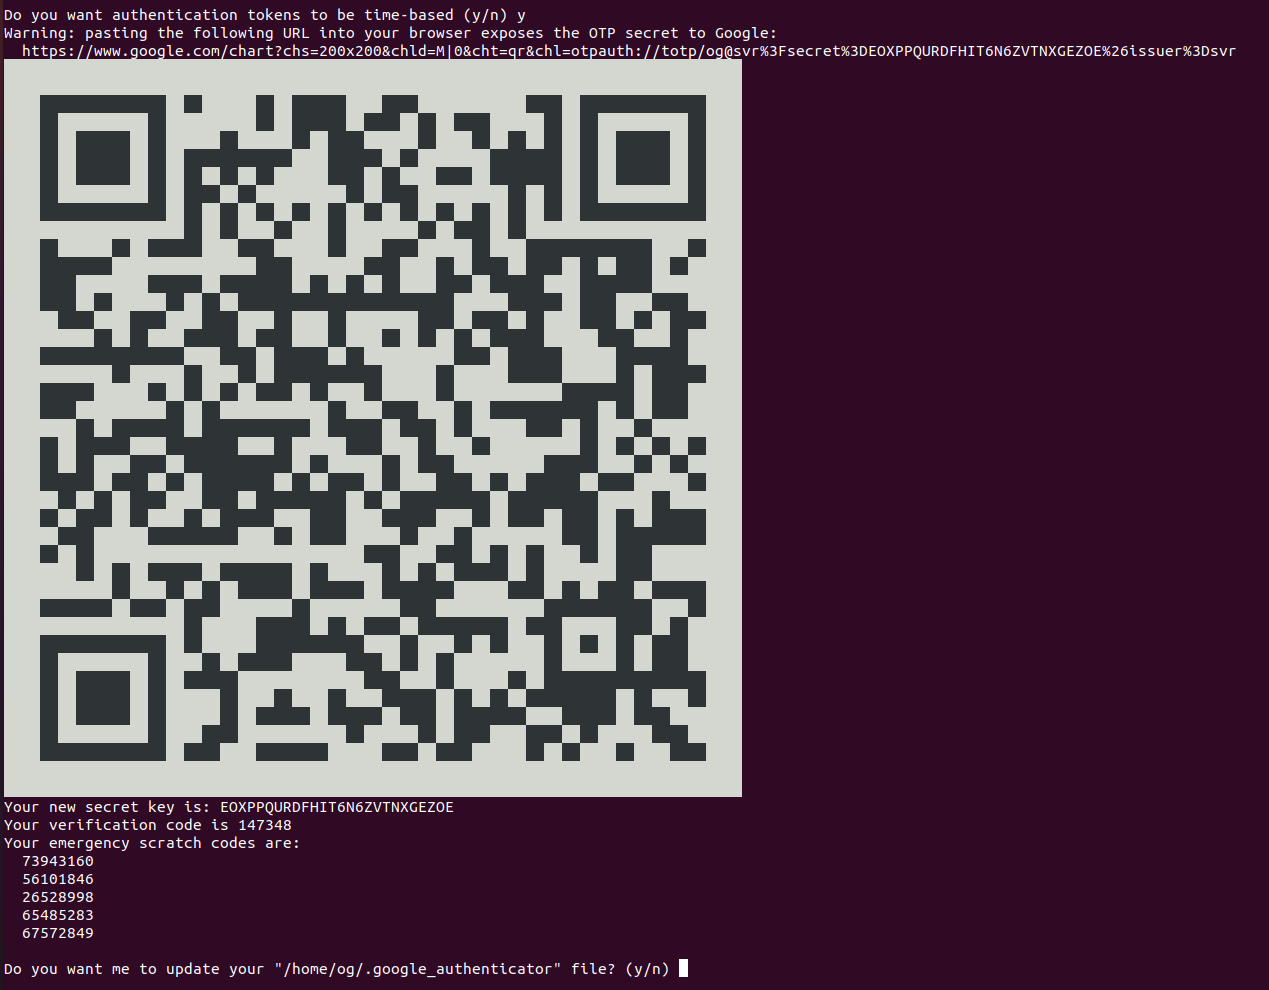
The QR code is your google authenticator 2FA key. Enter this into your phone app by opening the app and scanning the QR code generated on your screen. The authenticator app uses the above QR code (key) to generate seemingly random numbers that change every 30 seconds. This is our 2FA code and using it as part of your ssh login it makes it MUCH HARDER for someone to hack your ssh server.
PRO TIP: Also, take a screenshot of your QR code (i.e. the above) and save it in a very secure place (offline?) so you can re-create your 2FA credential if you ever e.g. lose your phone. It saves you having to reset everything, but keep it VERY SECURE (like your rsa private key).
Accept ‘y’ to update the google authenticator file. I accepted all the default prompts too, and that’s a pretty good setup so I recommend you do the same. Once you are done, you should see something like this:
Now edit the following file on your server:
sudo nano /etc/pam.d/sshd
Comment out the ‘@include common-auth’ statement at the top of the file by making it look like this:
# @include common-auth
(This disables the use of password authentication, which is very insecure, especially if you have a weak password). Then add these 2 lines to the end of the file:
auth required pam_google_authenticator.so
auth required pam_permit.so
Save the file. Now restart the ssh server using:
sudo systemctl restart ssh
Now open a NEW terminal window on our desktop (do not close the original window – we need that to fix any mistakes, e.g. a typo). Ssh back into your server using this second terminal window. If all has gone well, you will be prompted to enter the google-authenticator code from the app on your phone:

Enter the 2FA code from your smartphone google-authenticator app and hit enter, this should get you back at the terminal of your server, logged in SECURELY and using an SSH-key AND 2FA credentials. If all has further gone well, you will be greeted with your login screen – something like:
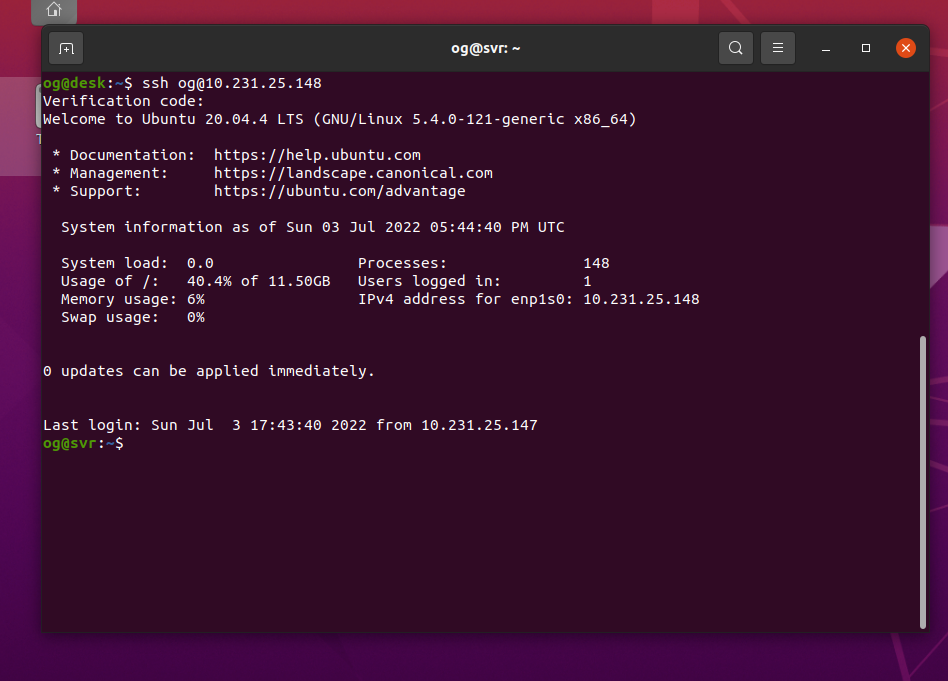
CONGRATULATIONS! You have now enabled 2FA on your server, making it much more secure against hackers. Your server is now much safer than the out-of-the-box method that uses a password only to secure a server. NOTE if you are unable to login, use the original terminal to edit your files and fix typo’s etc. DO NOT close the original terminal window until you have 2FA working, else you will lock yourself out of your server and will have to use a mouse, keyboard and monitor to regain access.
But we are not done yet – if you recall, I said we want to make this convenient, and this is the really EASY part. Log back into your server (if required) then re-open the /etc/pam.d/sshd file:
sudo nano /etc/pam.d/sshd
Add the following line above the prior two entries you made earlier (note that in my version below, the string wraps to two lines but it should all be on a single line):
auth [success=1 default=ignore] pam_access.so accessfile=/etc/security/access-local.conf
So to be clear, the end of your file (i.e. the last three lines of /etc/pam.d/sshd) should look like this:

Save the file. Now create and edit the following file. This is where we will make this configuration work differently for lan vs wan access:
sudo nano /etc/security/access-local.conf
Enter something like this, but change the 10.231.25.1/24 IP range to your lan. For example, if your lan is 192.168.1 to 192.168.1.255, enter 192.168.1/24. Mine is 10.231.25.1/24, so I use the following
+:ALL : 10.231.25.1/24
+:ALL: LOCAL
+:ALL:ALL
I know that looks a little…strange, but it will bypass 2FA requirements when the originating IP is as shown in line 1. My file looks like this:
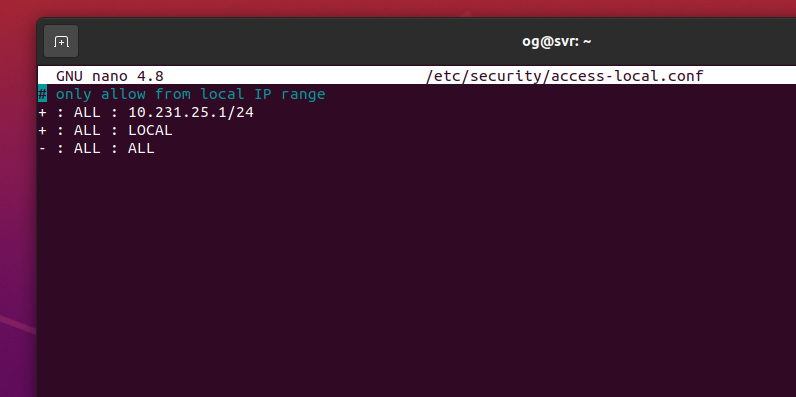
Save the file, quit your server then re-login to your server (no need to restart even the ssh-server – this works straight away). You are immediately greeted with your login screen – no 2FA credential is required:
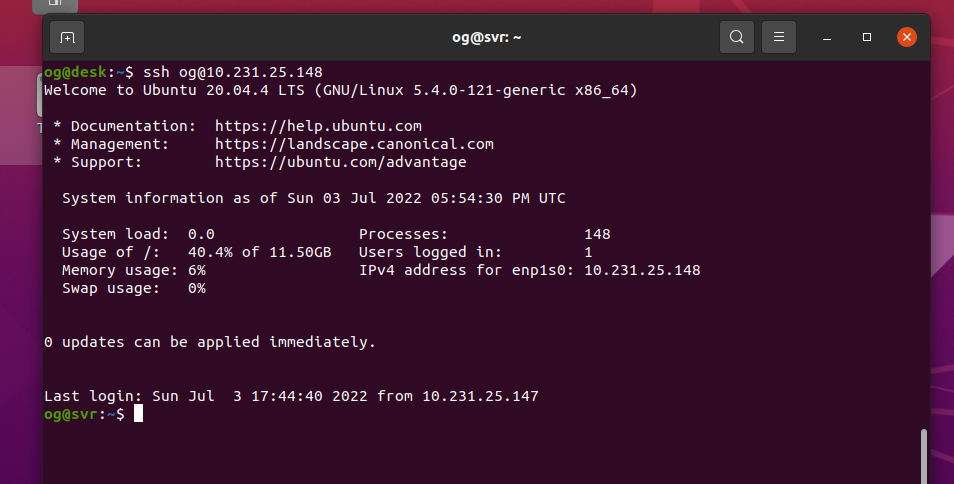
So you are no longer asked for any 2FA key, but only because you logged in from your lan. That’s because the server knows you are accessing ssh from your lan (i.e. in my case, an address in the range 10.231.25/1 to 10.231.25.255 in the above example), so it will bypass the need for 2FA. If you try to login via any other ip range – say a wifi hotspot in a hotel, or indeed ANY different network you will need to enter your 2FA credentials in addition to having the ssh key of course (which you need for lan access too – i.e. the .ssh/id_rsa keyfile).
BONUS TIP – remember I touched on the use of passwords for rsa keys. They too are useful but can be “inconveneient” to re-type every time. There are password caching mechanisms for logins (google is your friend), but you can also make this “even more secure” and yet still very convenient for lan acccess by adding a password to the copy of your private rsa key that you use to access the server remotely, but dispense with that for the ssh key you use to access it locally.
I hope this tutorial helped. Comments very welcome and I will try to answer any questions too! I can be reached on @OGSelfHosting on Twitter.
